Quantcast
Channel: The Nail Polish Challenge
Viewing all 216 articles
Browse latest View live

Classic Leopard Print Nail Art

$
0
0
Hi guys, I have yet another copycat manicure to show you today! I recreated this one from @iloveyou432 on Instagram. I love the classic look and how nicely all the colors pair together:


I started with a base of OPI Red Hot Rio on my outer two nails, OPI Chillin' like a Villain on my middle nail, and OPI It's Frosty Outside on my ring finger. Then, with my trusty dotting tool, I made leopard print with a mix of OPI I Sao Paolo Over There and OPI Chillin' like a Villain, and KBShimmer Eclipse for the outline, and topped my ring finger with KBShimmer Ice Queen for some extra holographic sparkle.

Like I said, I really love this color combination! Normally, this is the type of pattern I would go for in autumn, but I think that using almost all spring/summer colors makes this look much brighter.


Here are the colors I used, besides the black by KBShimmer. I got all the OPIs from HB Beauty Bar.

PS: I was interviewed by Nailpolis Magazine! I talk about my blog, my inspiration, and of course some tips for beginners. Give it a read if you'd like to know more about me and The Nail Polish Challenge!


Delush Summer 2014 Collection: Essence of Summer Swatches

$
0
0
Hello guys! I've got swatches to show you today from Delush Polish, an indie brand that features some gorgeous colors. Their new summer collection, the Essence of Summer Collection, consists of eight bright polishes with a unique shimmery finish. Warning: this post is photo heavy! I wanted to capture the gorgeous shimmer, so I have two photos of each polish!


Here are all of the polishes in the collection. They're all gorgeous, and the formula is easy to use, but the polishes are a bit sheer. Most of the photos you see above required 3-4 coats for opacity without any visible patches! But I think these pretty colors are worth it ;)


First up is 
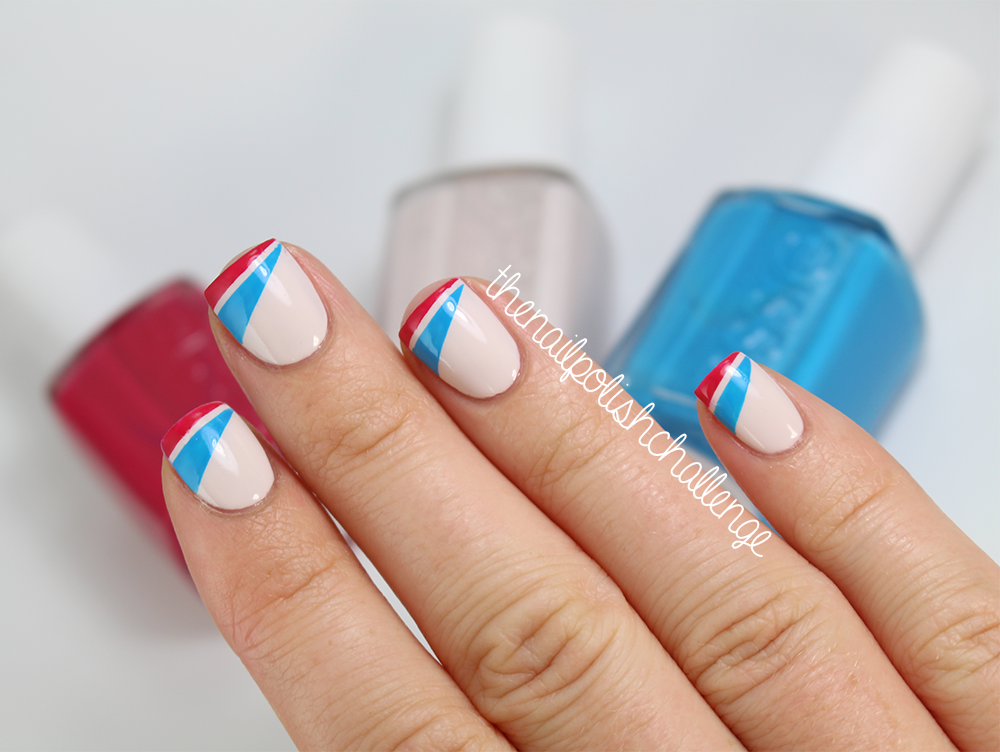
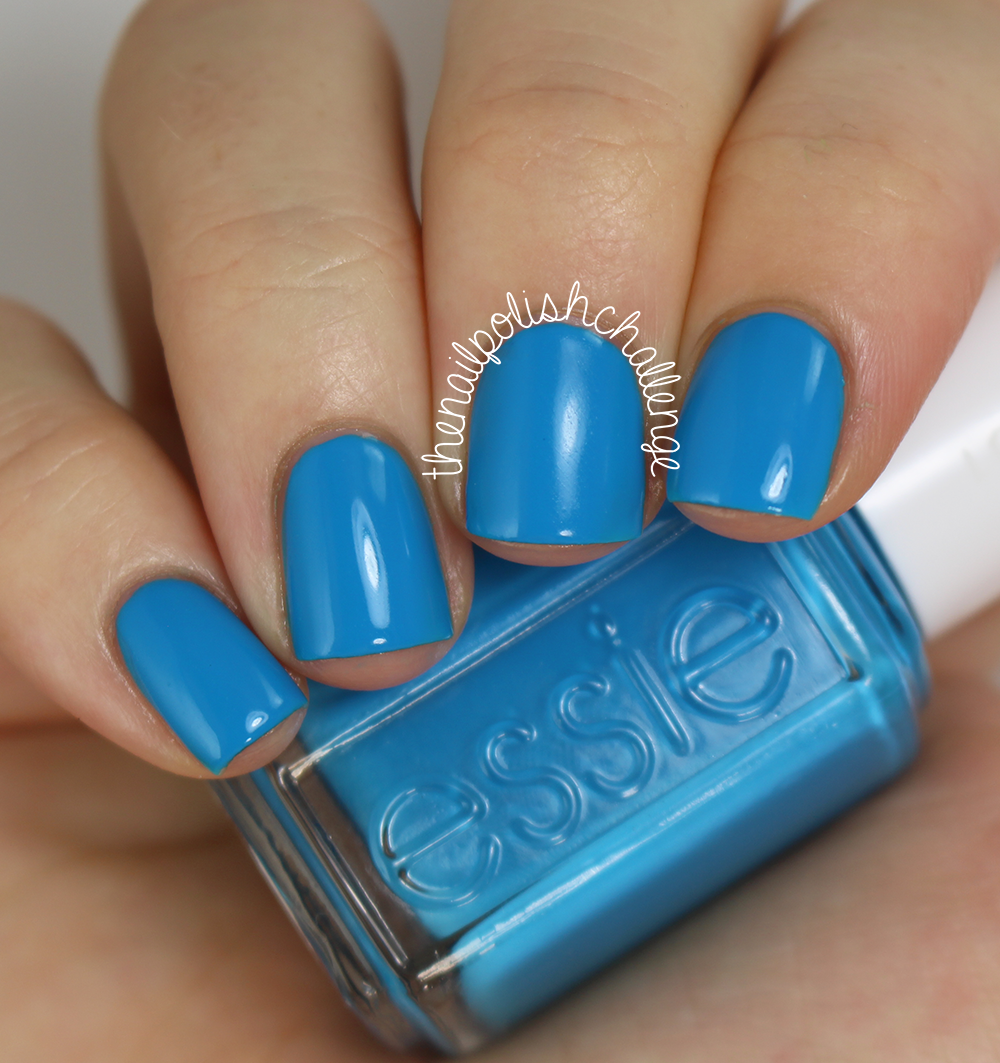
It's About Thames, a gorgeous sky blue polish with a gorgeous green and purple shimmer. I absolutely love this color - light blues like this are perfect for summer, and this one is no exception. Perfect for a day at the pool! This was one of the more opaque polishes in the bunch, but I had to add a third coat to cover up any slight patches. Shown above is three coats and top coat.


Here is a shot in the bottle and a closeup on the nail. Isn't it so pretty?


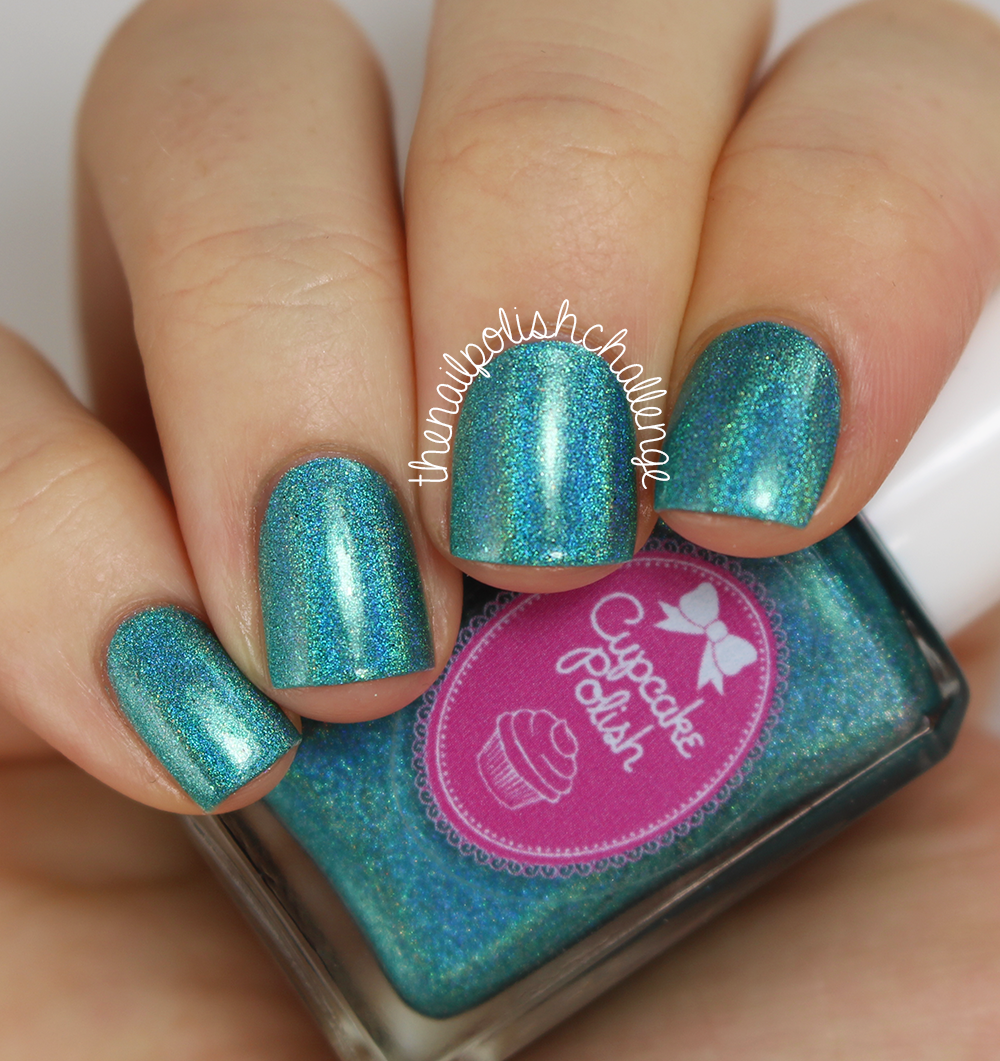
Shake Your Teal Feather is a - you guessed it - light teal polish with a gorgeous blue and fuchsia shimmer. I'm obsessed with this one! It's more subtle and delicate than most polishes out this summer, which I love. Shown above is four thin coats and top coat.


Here is a closeup in the bottle and on the nail. Look at that shimmer!


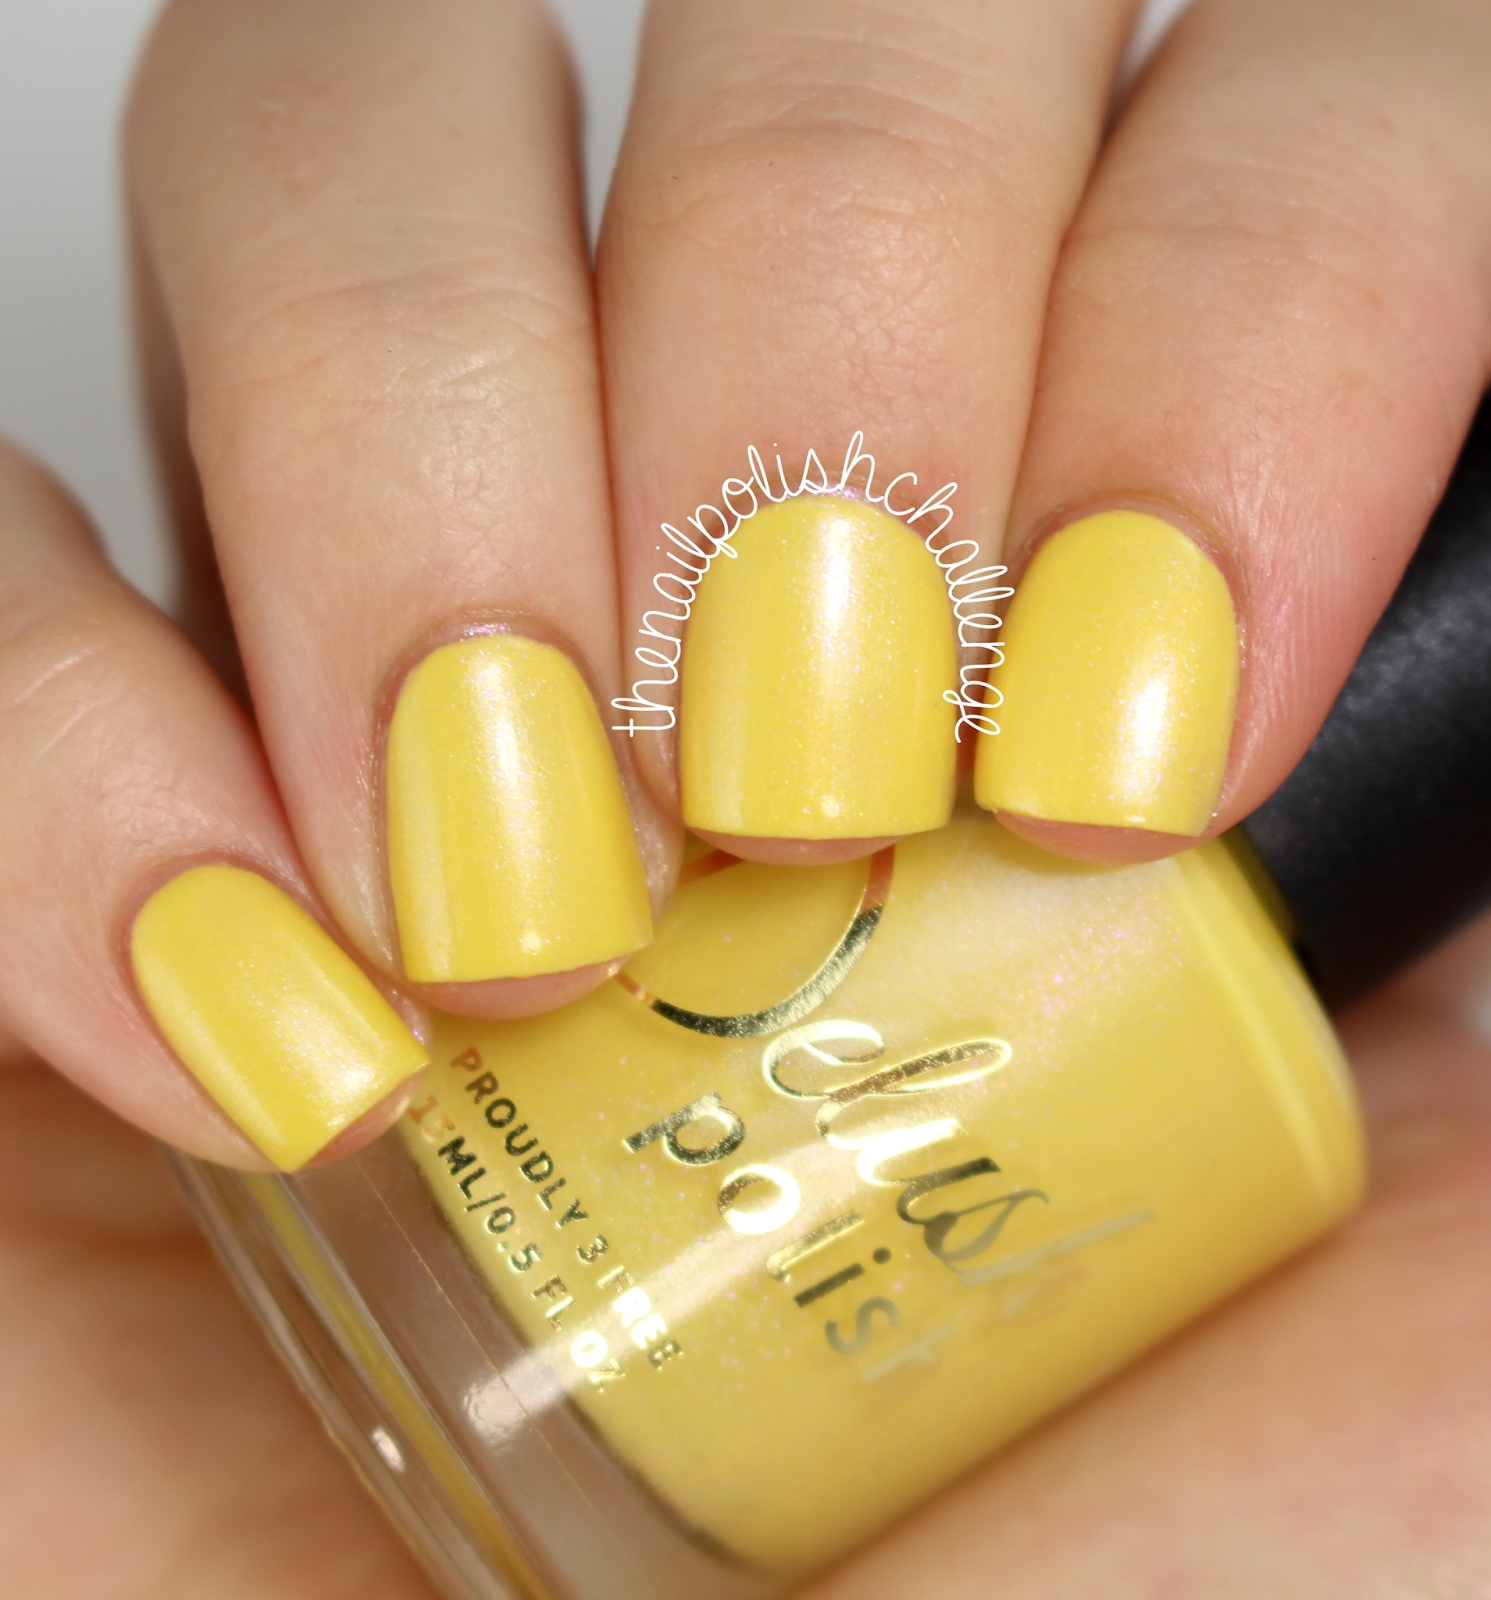
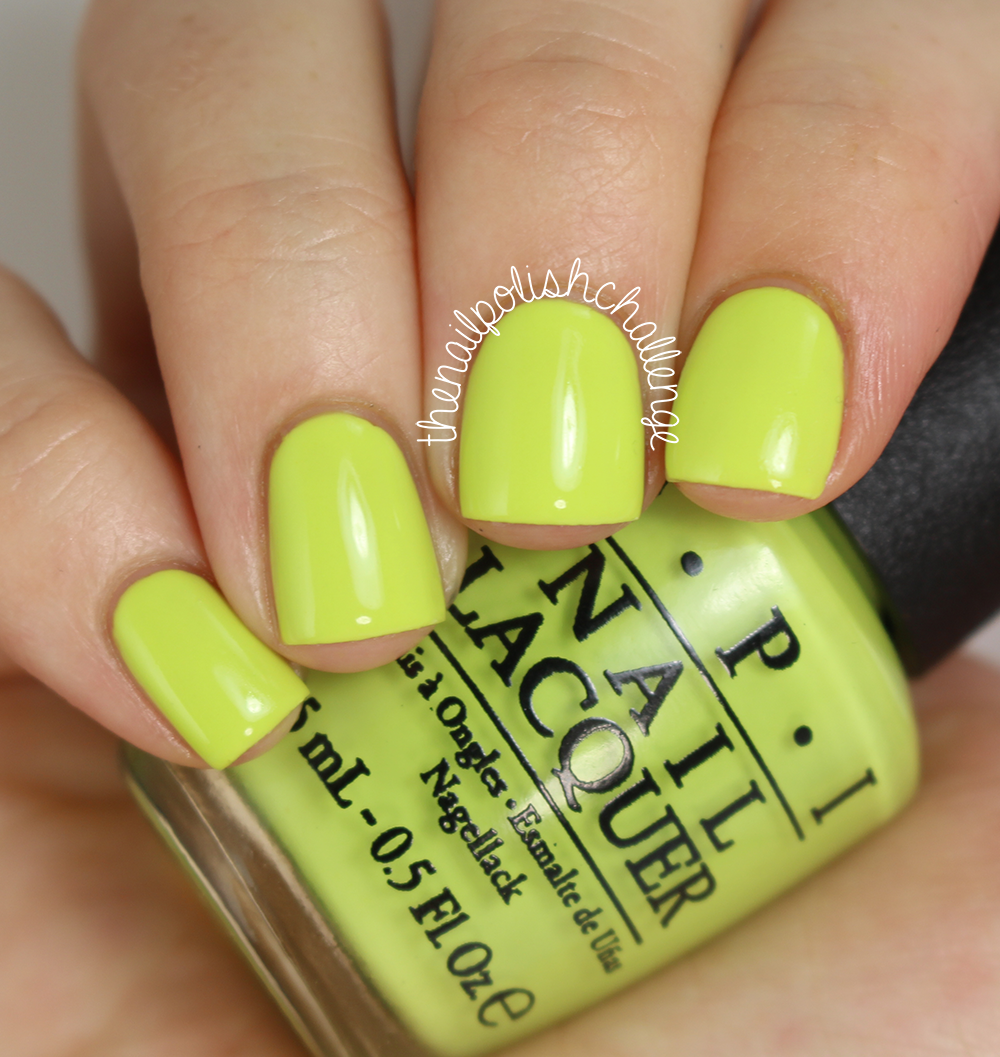
You Glow Girl is a sunshine yellow polish with a gold, fuchsia and blue shimmer scattered throughout. I have a tough time liking yellow polishes with my skin tone, but I happen to think this shade looks awesome on me! I have a feeling this color will be universally flattering on all skin tones, because it's so bright. Shown above is four thin coats with top coat.


Here is a closeup in the bottle and on the nail. I had a bit of trouble capturing the shimmer in this polish, but it's definitely noticeable in person!


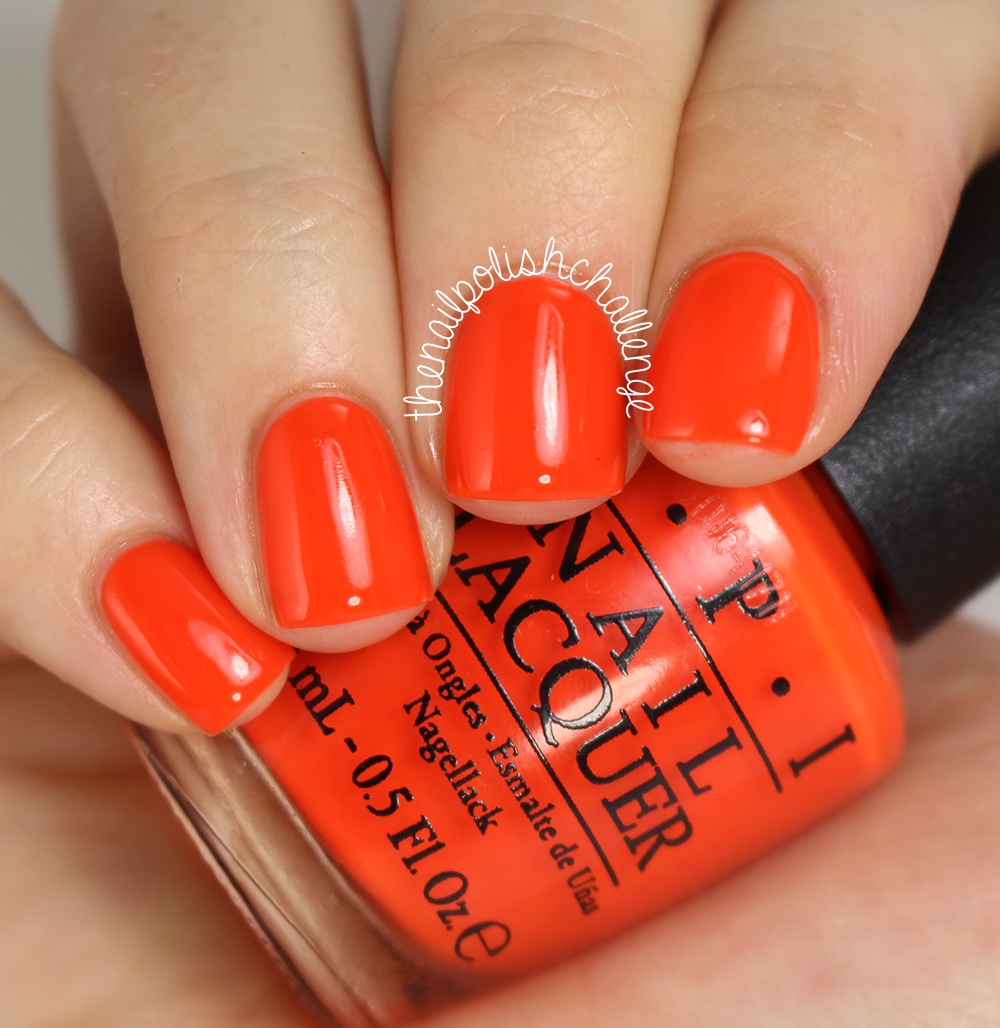
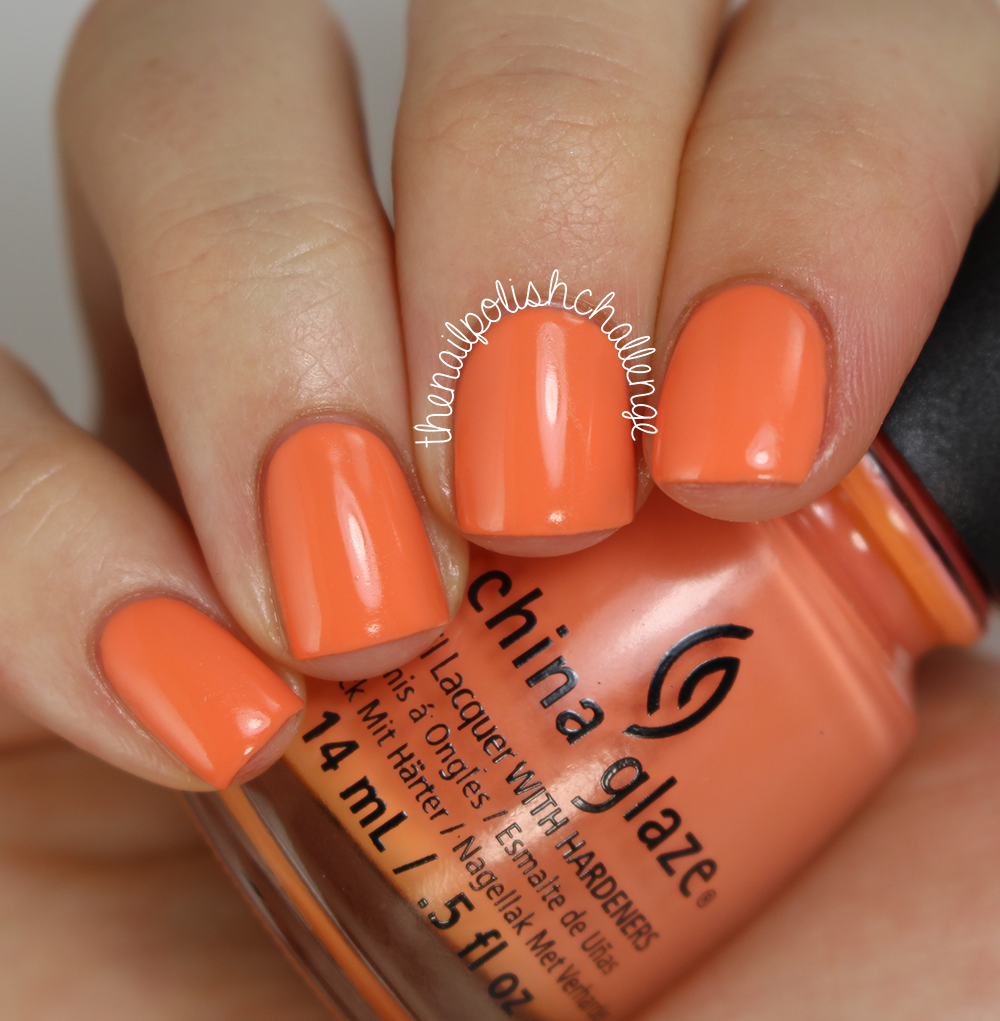
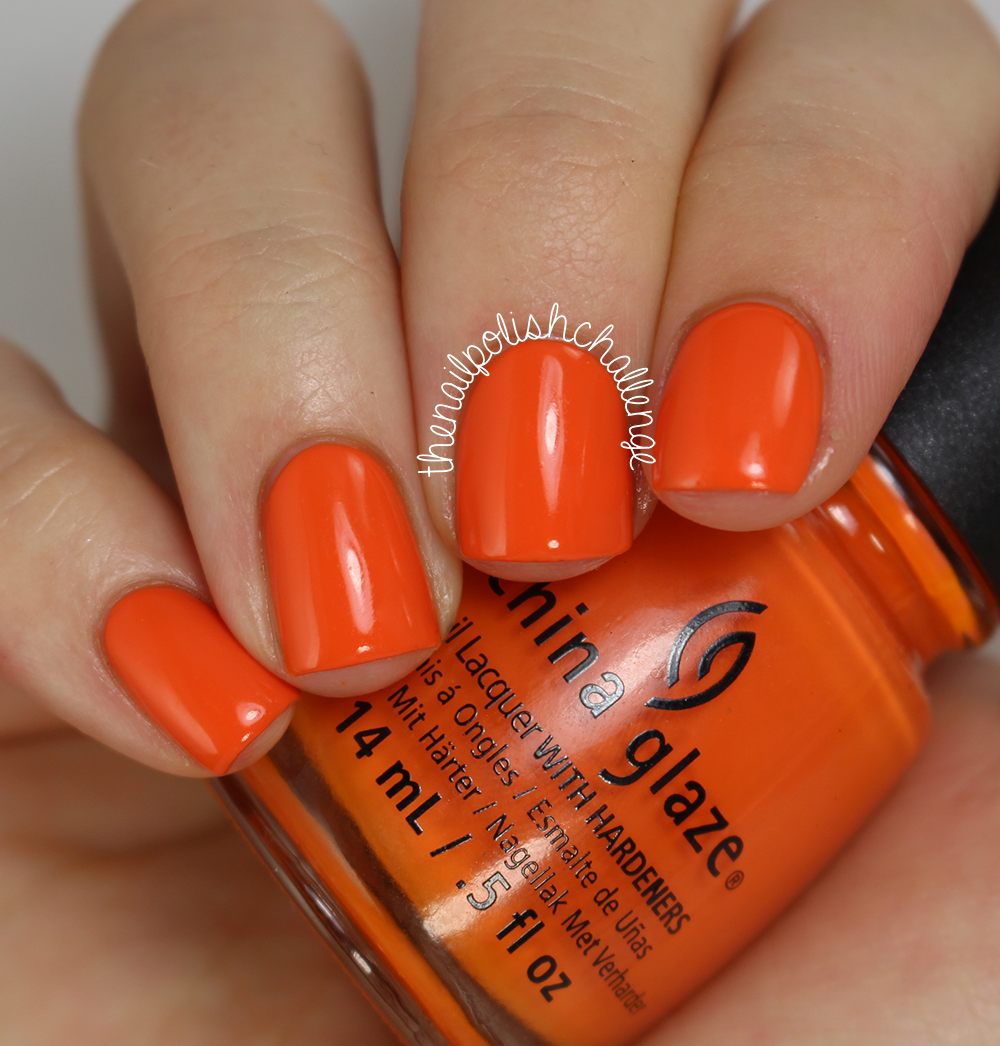
Brazen is a bold orange packed with gold and fuchsia shimmer. Again, I don't normally find myself reaching for oranges, but I love this one with my skin tone! This polish is definitely beach appropriate. Shown is three coats and top coat.


Here's a closeup on the nail and in the bottle. Look at that intense gold shimmer!


Bombshell is a cool toned Barbie pink with a light blue shimmer. This type of pink is so in this summer, and I love it! Cool toned pinks are gorgeous, and this one definitely fits the bill. Shown above is three coats and top coat.


Here's a closeup on the nail and in the bottle.


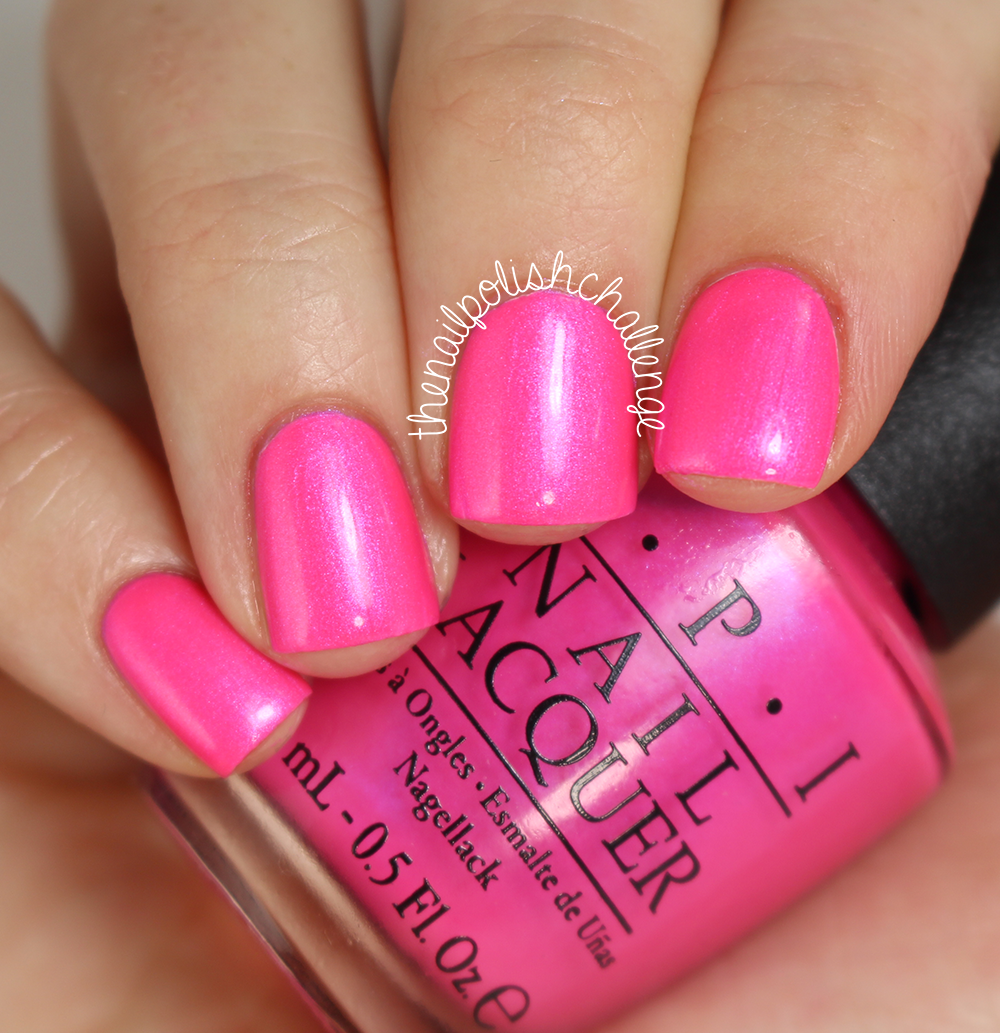
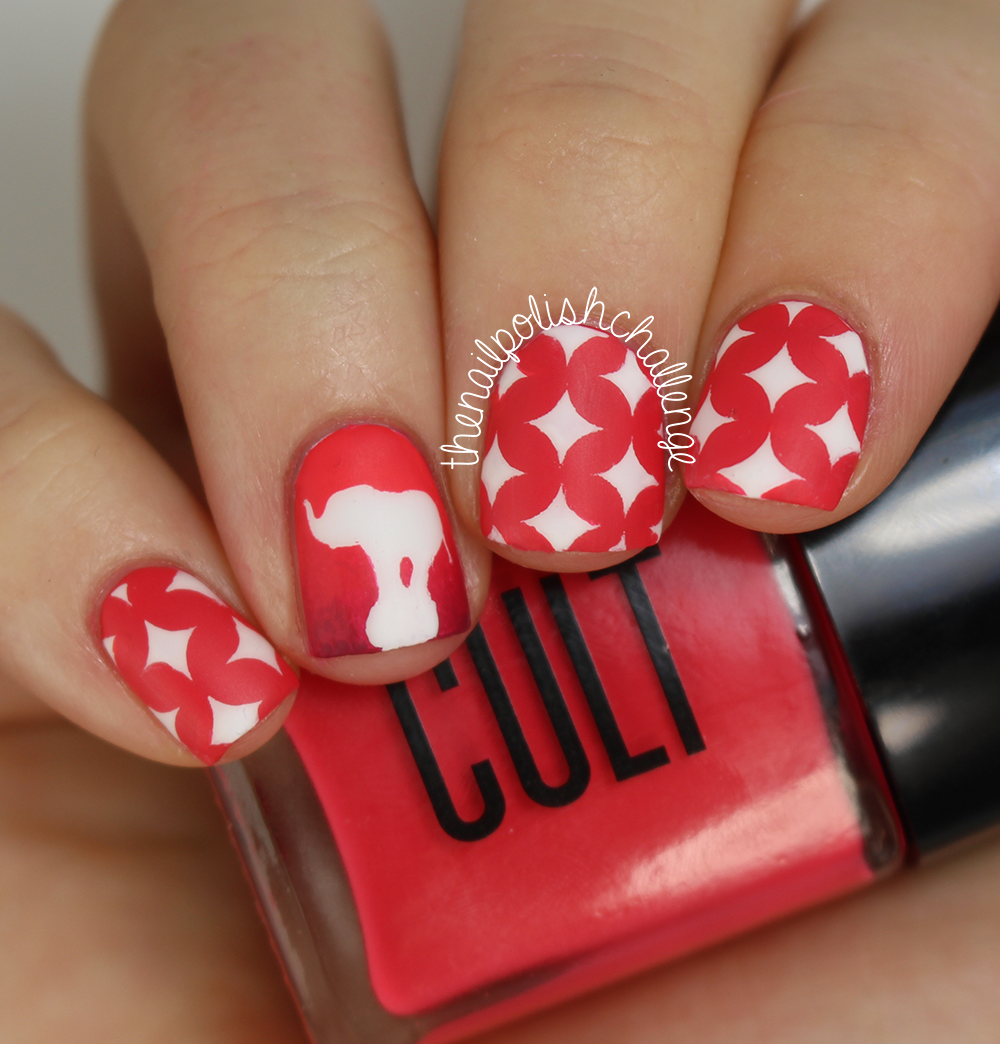
Indulgence is a hot red-pink with an intense fuchsia shimmer. This is a classic color for all of you pink lovers - I think it'll look great on toes! This was the most opaque polish of the bunch, and it only took two coats for full opacity, as shown above (with top coat.)


Here is a closeup on the nail and in the bottle.


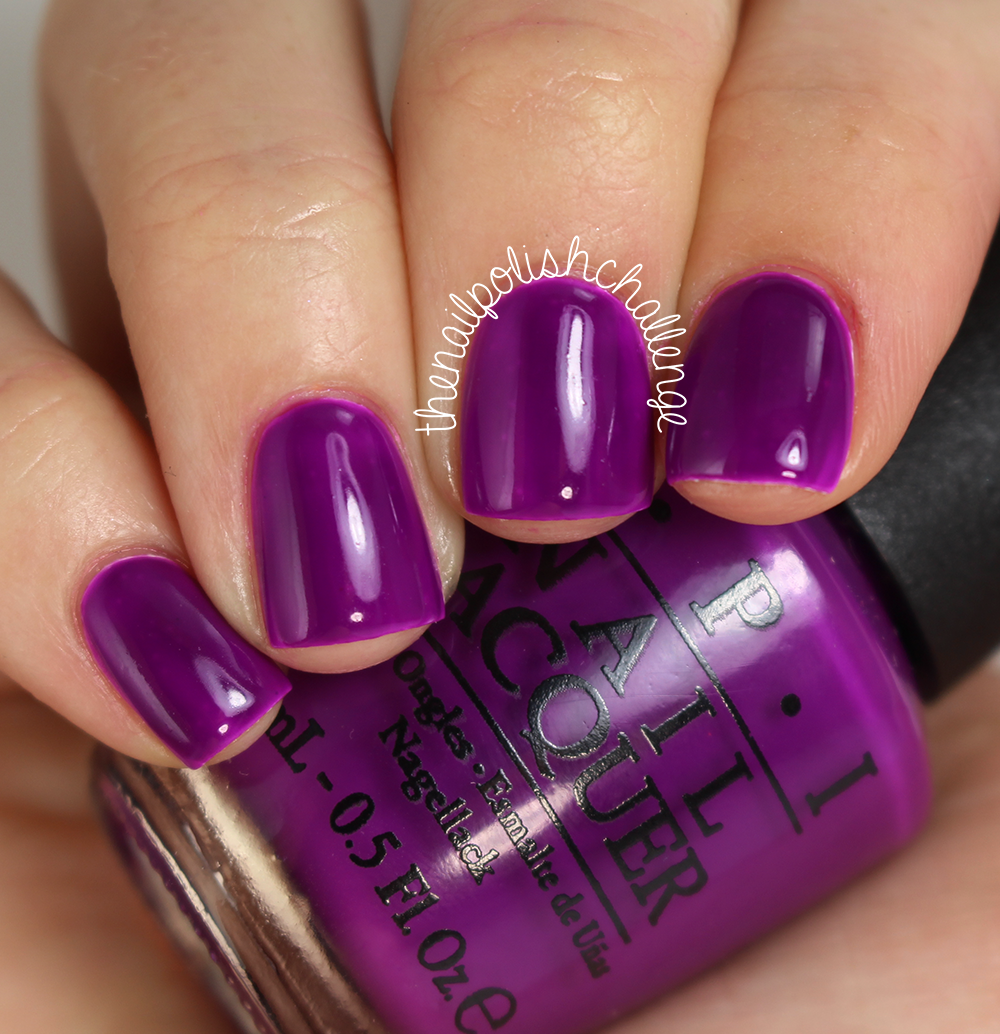
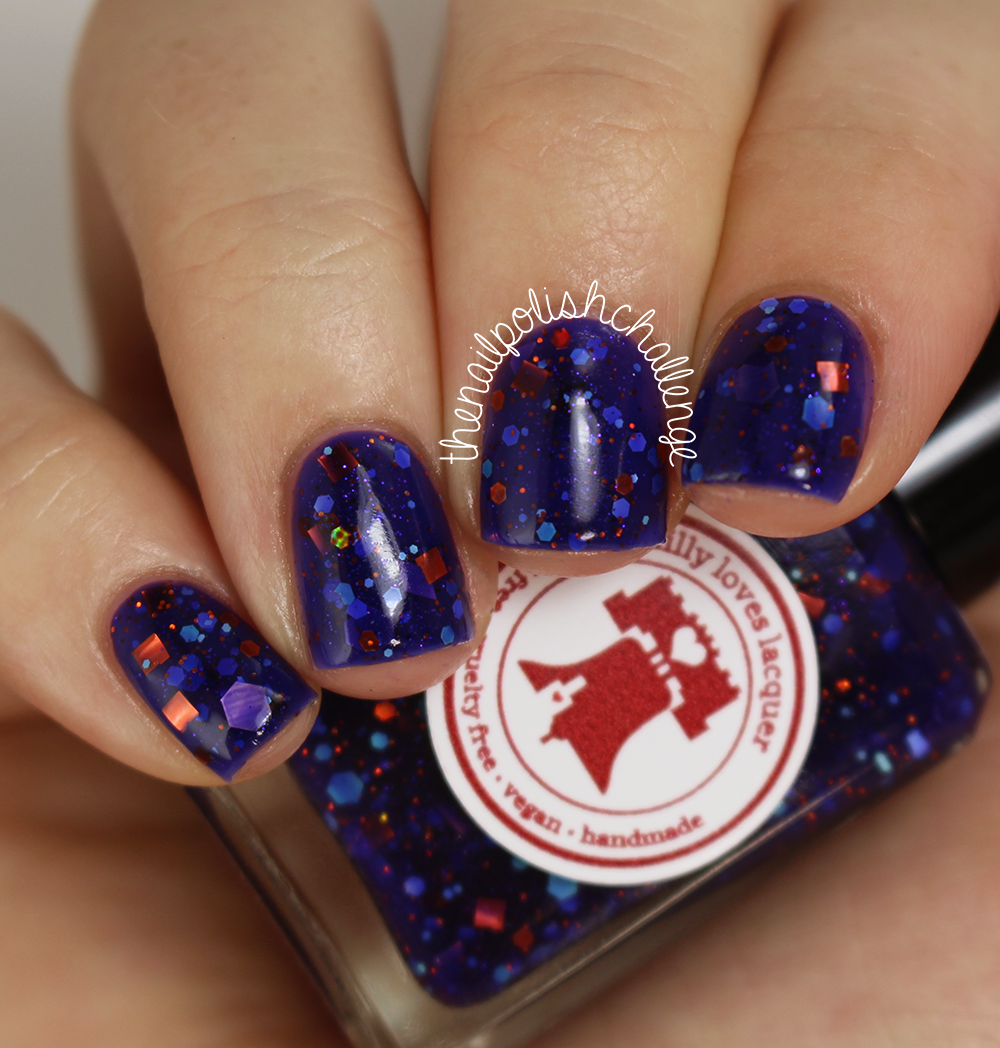
Orchid Situation is a pretty lavender shade with a blue-green shimmer. I actually really love this pairing of color and shimmer - something we've been seeing this season, but I can't get enough of! Shown above is three thin coats and top coat, but I think I could have benefited from adding a fourth to make the color really pop.


Here is a closeup in the bottle and on the nail.


And last, but definitely not least, we have Swans Upon a Time, a white polish packed with radiant red and fuchsia shimmer for a beautiful glow. Now this polish is nothing like anything in my collection! It's so classy and delicate - it really reminds me of swans, or white roses! (Plus, white is perfect for showing off your tan!) Shown above is four thin coats and top coat.


Here is a closeup in the bottle and on the nail. Isn't it just radiant?

Overall, I am really loving these colors. I could see myself wearing them all summer! Like I said, most of the colors will require 3-4 coats for full opacity, but I think it's worth the effort. (And the polish isn't thick, so it won't feel too heavy on your nails!) My top picks are Shake Your Teal Feather, BrazenBombshell, and Swans Upon a Time. Which are your favorites?

The Essence of Summer collection will be available tomorrow, Friday June 27th, at noon eastern time at the Delush Polishonline shop. You can also follow Delush Polish on Facebook for news and updates!


For those of you who've never shopped with 
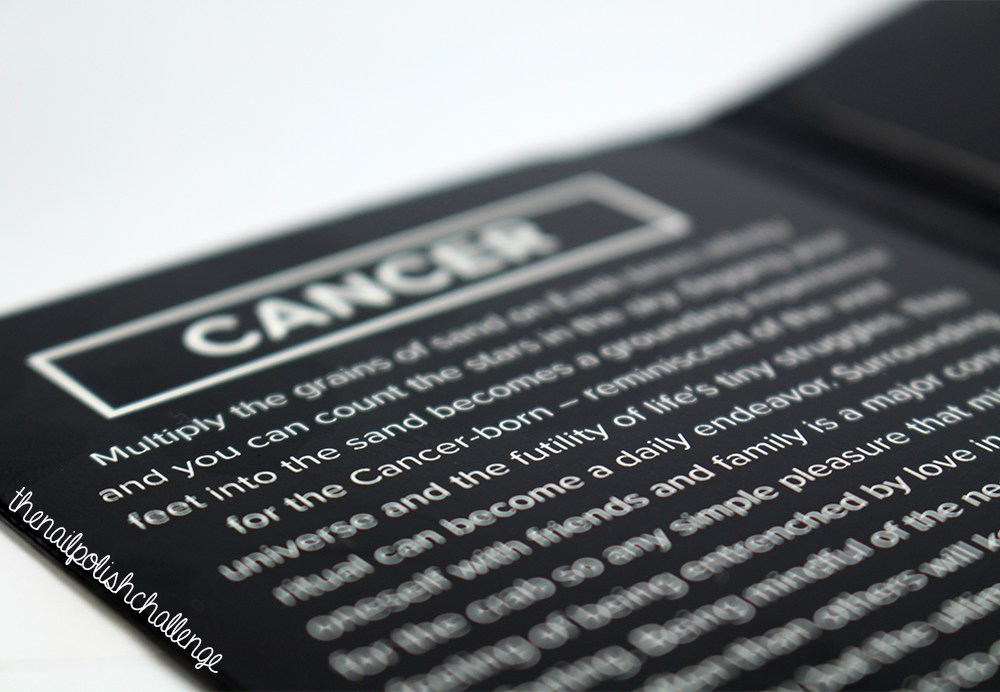
Delush Polish before, they offer an awesome scratch off card with every purchase (no matter what you buy) where you have a chance to win awesome prizes, ranging from free shipping on your next order, to naming their next nail polish collection!


I even got a scratch off with my polishes! Of course, not every card is a winner, but the thrill of the gamble gets me every time ;) You can read more about the Scratch Your Heart Out card here.

What do you think of this collection? Which ones will you be picking up tomorrow?


These polishes were provided for my honest review.

Essie Haute in the Heat Patriotic Nail Art

$
0
0
Hello guys! I have some simple striping tape nail art to show you today (inspired partly by this gorgeous manicure) using some of my new Essie Haute in the Heat polishes from HB Beauty Bar. I think this manicure turned out a bit patriotic, which is great timing, since Independence Day is coming up here in the USA!


I started with a base of Essie Urban Jungle on all nails. Then, I taped off sections with striping tape and painted on Essie Haute in the Heat, and Essie Strut Your Stuff. I topped it all off with a quick drying top coat.


I love how this turned out! It almost reminds me of little abstract sailboats. I think it's a nice, refreshing take on the usual patriotic manicure. I probably could have used a second layer of top coat to really smooth it out, though!


I hope I will have time to do more nail art before the 4th of July. (Or at least, before July 2nd, which happens to be my 23rd birthday!)


Here is a visual of the polishes I used. I will be swatching this whole collection soon! (You can pick them up here.) What do you think of this manicure?


These polishes were provided for my honest review.

My Birthday Mani! Polka Dot Gradient

$
0
0
Hi guys - guess what?! That's right, today is my 23rd birthday! I did this fun nail art look inspired by @naildecor on Instagram to celebrate. I think it's pretty bubbly and fun, especially for summer!


I started with a base of Essie Mademoiselle and then dotted on OPI Alpine Snow, Essie Strut Your Stuff, Essie Sittin' Pretty and Colors by Llarowe Frenzy. This manicure was actually pretty simple, but I love the end result!


It almost reminds me of confetti, or colorful champagne bubbles! What do you think? I also love the color combination - of course, I had to use all of my favorite colors for my birthday manicure. (Although anyone who knows me well knows that blue is my all time favorite color!)


I think I love this manicure so much because it could easily be adapted to work for any season - I imagine gold, black and white dots would look so classy for New Year's! I will definitely have to try this manicure again with a different color scheme. Which colors would you like to see?


Here's a visual on the colors I used. Hope you all have a great day!

4th of July Nail Art with KBShimmer Nail Vinyl Decals

$
0
0
Happy 4th of July to all of those celebrating! I love Independence Day, enjoying the beach and watching fireworks - although, here in New Jersey, the weather isn't looking too friendly. At least I have some gorgeous nail art to show off, using some brand new nail vinyl decals from KBShimmer. This is a new release from KBShimmer, and they've already got tons of vinyls to choose from, which really makes it easy to create awesome designs on my nails without the stress of trying to draw freehand (or cut crazy shapes with scissors!)


To create this nail look, I started with a base of OPI Alpine Snow on all my nails. Then, I placed the Stars and Stripes nail vinyl decal set from KBShimmer, and painted on OPI Coca-Cola Red (from HB Beauty Bar, of course!) and KBShimmer Low and Be Bold. Then, I peeled off the vinyls and added top coat!


I think my first try with these decals ended up being a bit sloppy because I was impatient (and I was using awful tweezers to try to peel the stickers off!) Despite that, I think the finished look is very fun and very patriotic. I'm so glad I have the perfect red, white, and blue polishes to create this!


I think another reason for the sloppy work is because I haven't had as much time to paint my nails lately. I just have so many things going on, but I am really trying to fit more swatching and nail art into my schedule! I have big plans for my blog coming up, so stay tuned ;)


Here are the polishes I used to create this look.

KBShimmer nail vinyl decals are available in sheets for $5 USD each on their website, and come in several different patterns. I am excited to try them again (maybe the chevrons next time?!) and I promise I will be more patient with application. Don't forget to follow KBShimmer on Facebook for news and updates.

What are your plans for Independence Day?

Some products provided for my honest review.

Gradient Nail Art and Video Tutorial

$
0
0
Hi guys! I hope everyone had a great weekend. I've got some exciting news - I (finally!) made another YouTube video! After about a year of no videos, I decided it was about time to start making them again (although the old videos are no good, you've been warned! I hope to eventually delete the old ones and remake the tutorials with new helpful tips and hints.) Anyway, here is the manicure I created:


I decided to go with a simple gradient, because it seemed like a relatively easy first video to start with - and people always ask how I make them! Of course, there is definitely a learning curve to painting your nails on camera, so I will have to practice a bit more, but the video does show exactly how I usually make gradients. I used China Glaze Wait N Sea and China Glaze I Sea the Point from HB Beauty Bar for this gradient. (I wanted to use the same color scheme as my recent sailor skittle manicure.)

Well, let's get to the video! Or, click here to be redirected to the video on YouTube.


Let me know what you think of my first tutorial! And if you have any requests for future tutorials, comment or send me an email :)

Colors by Llarowe Summer 2014 Collection, Part 2: Holos and Glitters

$
0
0
Hi all, I'm back with part two of my Colors by Llarowe review - most of you will remember part one of my review here. Well, today I've got seven more colors to show off:


I've got five linear holographic polishes, one glitter crelly, and one glitter topper, all with a similar formula to the first polishes I reviewed - thick, but easy to apply. Let's look at them individually, starting with the holos:


My Own Private Island is a bright fuchsia polish with a strong linear holographic finish. This polish immediately caught my eye and I think it's a perfect summer color, because it's just radiant in the sunlight, but the color is also gorgeous indoors. Shown above is two coats, no top coat needed.


Next we have another perfect summer color. Refresh...ing! is a turquoise polish with a strong linear holographic shimmer. Again, this is a polish that is stunning outdoors, but has a pretty color on its own as well. And you all know how much I love to rock a blue polish by the pool! Shown above is two coats, no top coat needed.


Watch Me Fly, See Me Soar is a surprise favorite of this bunch, a pewter polish with a strong linear holographic shimmer. I think the dark color makes the holo stand out a little more, which I love. Shown above is two coats, no top coat needed.


Olivia is an olive polish with a strong linear holographic shimmer, another dark and stunning polish! I imagine this would look perfect for going out at night, because the color is subtle but edgy on its own, and beautiful with the holo! Shown above is two coats, no top coat needed.


Blonde Ambition is the last of the linear holographics I am reviewing, and it's definitely the strongest. This copper polish just sparkles with holo in even the slightest bit of light! I was worried that the color would blend in with my skin tone too much, but I think the holo shimmer fixes that easily. Shown is two coats, no top coat necessary.


I'm Seeing Spots is a black and white microglitter top coat that would look great over any color. It reminds me of the fuzz you see on a television when you have no reception, but I love it! I decided to pair it with KBShimmer My Life's Porpoise. Shown is one coat over gray, and top coat.


And finally we have Subtle Little Number, a milky white crelly filled with bright pink microglitters, as well as purple dots, light pink and yellow hexes, and even little lavender squares. I think I see some white hexes in there, too! This is definitely a very delicate and feminine polish, and I think it looks pretty elegant on the nails, but the glitters do require some fishing and placing. Shown above is three thin coats and top coat.

I am really enjoying these polishes for summer - the holographics are just perfect for sunny days! My favorites of this bunch are I'm Seeing Spots, My Own Private Island, and Watch Me Fly, See Me SoarYou can purchase these polishes for $10-$12 USD each (depending on the color) on the Llarowe online shop. Make sure you "like" them on Facebook for news and restock dates.

Which are your favorites so far?


These polishes were provided for my honest review.

KBShimmer Summer 2014 Collection Part 2: Holos & Crellies

$
0
0
Hello! I've finally swatched the second half of the KBShimmer Late Summer 2014 collection to show you all, and I'm really excited about these! If you recall, the first half of the collection consisted of glitter toppers and creams. Well, this half consists of five crellies and one holographic polish:


Let's start with the "crellies" - aka, jelly-like cream polishes, filled with glitters!


Sea You Around is an emerald green jelly packed with fuchsia, silver, and teal glitters in various shapes and sizes, including circles. I'm so impressed with this polish - as someone who isn't a huge fan of greens, I could see myself wearing it often! The glitters match the cool-toned base perfectly. No dabbing or fishing required! Shown above is three thin coats with KBShimmer Basic Training base coat and KBShimmer Clearly on Top quick dry top coat.


Periwinkle in Time is a gorgeous cool periwinkle crelly packed to the brim with blue, turquoise, silver, and purple holographic hex glitters in various sizes. This one is just gorgeous! Again, no fishing or dabbing required - but this one is really packed with glitters, so you might have to wipe the extras off your brush before applying. Shown above is three thin coats with KBShimmer Basic Training base coat and KBShimmer Clearly on Top quick dry top coat.


Peak My Interest is a dusty pink jelly featuring white, pink, and blue glitters in various sizes and shapes - most notably, triangle glitters! I'm really excited about this polish, if only because of the triangle glitters and how new they are to me. The glitters don't sink to the bottom at all, but I did fish around for some extra triangles to show them off. Shown above is three thin coats with KBShimmer Basic Training base coat and KBShimmer Clearly on Top quick dry top coat.


Look High and Holo is a dark pink jelly packed to the brim with a rainbow of holographic glitters in various shapes and sizes, including square glitters. I was not sure how I would feel about this polish when I first saw it, since it's very busy - but once I tried it on, I totally fell in love! Especially when they catch the light, the glitters truly dazzle. I could have benefited from using a second coat of top coat, though. No fishing required - this one is PACKED! Shown above is two thick coats with KBShimmer Basic Training base coat and KBShimmer Clearly on Top quick dry top coat.


What would a KBShimmer collection be without a white crelly? Mixed Peelings is just that - a white crelly polish filled with red, yellow, and green satin glitters. If you're a white crelly lover, you won't be disappointed! But since there were so many exciting polishes in this collection, I found that this one fell kind of flat for me. Shown above is three thin coats with KBShimmer Basic Training base coat and KBShimmer Clearly on Top quick dry top coat.


And finally we have Mint-al Vacation, the dusty, holographic cousin of KBShimmer Touch of Glass. The holographic shimmer in this polish is a bit more subtle than the usual KBShimmer formula, but it's gorgeous nonetheless! Shown above is two thick coats with KBShimmer Basic Training base coat and KBShimmer Clearly on Top quick dry top coat.

Overall, I have to say I'm really impressed with almost the entire collection! KBShimmer really nailed it with the crellies, and the glitter toppers are gorgeous as well. My favorites in this bunch are Sea You Around and Periwinkle in Time.

These polishes are available on the KBShimmerwebsite for $8.75 USD each. Don't forget to follow KBShimmer on Facebook and Instagram for news and updates.

And of course, you can find my Instagram page here, where I will also be posting all of my swatches!

Which of these colors will you be getting?

Polishes provided for my honest review.

HB Beauty Bar: OPI Go Neon or Go Nude Collection Swatches

$
0
0
Today I've got a long overdue post for you - I finally swatched the OPI Go Neon or Go Nude Collection from HB Beauty Bar! This collection consists of six bright neon polishes - four creams and two shimmers - and a white base coat to help the colors pop!

OPI Go Neon or Go Nude

I didn't photograph a swatch of the white base coat, because it's just a basic white polish. It's pretty nice though, and it'll probably come in handy for nail art! I decided to swatch the first three polishes on their own without the white base, because they were opaque enough on their own, and the other three are layered over white (because they had a sheer finish). It's not completely necessary to layer, but it does help brighten the polish, so it's worth trying.

OPI-you-are-so-outta-lime

Let's start with You Are So Outta Lime, a soft neon green cream with a fabulous formula. Seriously, I loved applying this one! It was super smooth and creamy, and I probably could have gotten away without using top coat since it was shiny on its own. And it definitely has a nice color - I might become a green polish lover yet! Shown above is three coats and top coat.

opi-life-gave-me-lemons

Life Gave Me Lemons is a creamy highlighter yellow that definitely screams summer! Again, this one had a great formula and I love the color - I am surprised that I didn't have to layer this one over white, it was fully opaque and bright without any base coat. The formula was very similar to the green polish. Shown above is three coats with top coat.


Juice Bar Hopping is a bright neon orange cream that reminds me of traffic cones. This is the last polish I chose to apply without the white base, because I thought the jelly-like formula would do well on its own - and I was right! But if you are looking for a brighter finish, I suggest applying it over white. Shown above is three coats and top coat - this one had a rubbery matte finish before applying top coat, as is usual for neon polishes.


Let the layering begin! Down to the Core-al is a gorgeous neon coral polish packed with a pinkish shimmer. Seriously, my photos do not do this eye-searing polish justice! I layered two coats over white, and the result was just beautiful. I could wear this one on my toes all summer, and I love how tan it makes my skin look! Shown above is two coats over the OPI white base coat, and top coat. (Again, this one dried to a matte finish, which actually looked pretty awesome, but I figured I should top coat it for consistency!)


Hotter Than You Pink is a cool toned neon pink packed with bright blue shimmer. Again, I layered this polish over white to get the full bright effect! I'm obsessed with this kind of pink this summer, and this polish is no exception. This polish has the same formula as the coral shimmer above, and dried to a matte finish. Shown above is three thin coats over OPI white base coat, and top coat.


And finally, we have Push & Pur-pull, a dark purple jelly. I didn't think this polish matched the rest of the neon collection, but I do like the color. I decided to layer it over white because it is so sheer, but I probably could have benefited from adding an extra coat for opacity. I think this color would be great for gradients, since jellies are my favorite for creating them (they make the transition look so smooth!) Shown above is three thin coats over the OPI white base coat, and top coat.

Overall, I love most of these colors and I can already see myself rocking them by the pool or at the beach this summer. My favorites are definitely Hotter Than You Pink and You Are So Outta Lime.

All of these polishes are available on the HB Beauty Barwebsite for $8 USD each ($8.95 USD for the white base coat), or for $55 USD for the entire collection, including the white base coat. Don't forget to use the code POLISHCHALLENGE at checkout to get 15% off your entire order!


Which colors do you like best?

Products provided for my honest review.

Easy Watermelon Nail Art and Tutorial!

$
0
0
Hi guys! I hope everyone is having a nice week - personally, I've been curled up on the couch reading my new Game of Thrones books, so I haven't given myself any time to paint my nails! (If any of you watch the series or read the books, you'll know why I can't put them down! Haha.) Anyway, I'm back with another summery nail art tutorial - this one is really simple, and the detail nail is inspired by my recent nail art swap with Magnifique Nails.


I decided to keep the other nails simple, so even a beginner could easily follow this tutorial. All of the polishes used and nail art brush details are in the video, as well as the video description.

Here is the tutorial video (or, you can watch it on YouTube here!):


What do you think? What nail art look would you like to see in a tutorial?

SCRATCH Nail Wraps Review, Zodiac Collection: Cancer

$
0
0
Hi all! I've got another set of nail wraps to show you today - this one is from SCRATCH, a widely known brand that has a ton of unique and gorgeous nail wrap designs. They have a series of gorgeous Zodiac inspired nail wraps, and since I am a Cancer (born on July 2nd!), I just had to try this set out.


First, let me say that the designs on this set are spot on! This design features all of the symbols of the Cancer symbol, with a milky black background shimmering with holographic microglitters to represent the stars in the sky. Cancer is a water sign, identified by the crab, which you can see on my index nail, and the 69 symbol, which you can see on my middle nail. There was also a sand inspired design in this set, which fit perfectly on my thumbs. I'm particularly obsessed with the pinky nail design (I might have to copycat this design with real polish!)


Onto the technicals - these nail wraps were very easy to apply! Some of them were slightly too large for my nails, but I just used a clean up brush and some acetone to wipe away the excess.

The only problem I found with these wraps was wearability - I thought that adding top coat would help, but when I applied it to the first few nails, I noticed the nail wraps getting wrinkled and shrinking, so I stopped. Of course, the nails that I applied top coat to lasted, but the rest were peeling up at the edges at the slightest touch. (Maybe it was the brand of top coat I used? I tried it with Glisten and Glow top coat. Let me know if you have had a similar experience with this!)


This set of decals comes with some adorable personalized packaging and a description of the inspiration behind the design, as well as information about the Zodiac symbol. It even comes with a matching midi ring! (Which I actually forgot to photograph! Doh! But, I did snap a quick Instagram photo of me wearing it on my birthday.) There is a lot of variation in the size of the decals, so anyone with large or small nail beds shouldn't have any trouble finding strips that fit.


Here is a little peek into the Cancer write-up in the packaging. So cute!

Overall, I am loving this design and set - but I'm disappointed that the wraps didn't last an entire weekend (some of them barely lasted a day!) But I think finding a proper top coat to use with them could be extremely helpful - I have another set of SCRATCH wraps, so I will definitely be testing other top coats.

If you're into astrology and Zodiac signs, then these sets are a must have. The price is a bit steep at $24 USD per set, but keep in mind it does come with a cute personalized ring as well! You can purchase the Zodiac nail wraps on the SCRATCH online shop, and be sure to follow them on Facebook as they announce the release of new sets.

What do you think of these wraps?


This product was provided for my honest review.

Zoya Magical Pixie Summer 2014 Swatches

$
0
0
Hi guys! Today I've got the gorgeous Zoya Magical Pixie Dust Summer 2014 collection to show you! Anyone who loves textured nail polishes knows about Zoya's Pixie Dust polishes, which feature a fine sandpaper-y finish, and their even newer Magical Pixie formula, which features large chunks of glitter. Well, the new Magical Pixies are as gorgeous as ever - this collection contains three gorgeous textured polishes in various summery shades.


Here are the three polishes. I'm pleased to report that the formula of these new polishes are even better than the Spring 2014 Magical Pixies, and I'm more impressed with these colors.


Let's start with Arlo, a dark magenta pink textured polish packed with holographic glitters in various sizes.I love this one! It looks darker in the bottle than on the nail, but I do love the almost sheer effect it has on the nail. I think they almost look like crushed little seashells! Shown above is two coats, no top coat.


Here is a closeup in the bottle and on the nail.


Next we have Ginni, a gorgeous pale dusty pink textured polish packed with holographic glitters in various sizes. Another gorgeous pink polish! Shown above is two coats, no top coat.


Here's a bottle shot and a closeup on the nail.


And finally, we have Bar, a gorgeous warm gold textured polish packed with holographic glitters in various sizes. This polish, like Arlo, is a bit sheer but looks gorgeous on the nail (and I'm sure it would look more opaque with more coats!) Shown above is two coats, no top coat.


Here is a closeup in the bottle and on the nail.

Overall, I really enjoy these polishes, even though I disappointed to see that Zoya seems to have stopped making regular PixieDusts. I don't think I can pick a favorite out of these three - they're all so pretty, and the formulas are a breeze to apply. These colors are gorgeous (although a bit more fall appropriate than summer!) and I can't wait to see what they come up with next.

All of these polishes are currently available on the Zoya website and in stores that sell Zoya, for $10 USD per bottle. Don't forget to follow Zoya on Facebook for news and promotions!

Which polish is your favorite?


These products were provided for my honest review.

Colors by Llarowe: Toga! Toga! Toga! Swatch and Nail Art

$
0
0
Hi guys, and happy Saturday! Today I'm showing off an exclusive, limited edition polish from Colors by Llarowe that will only be available as a part of the August "A Box, Indied" subscription box from Llarowe. I also decided to snazz up my swatch with some KBShimmer nail vinyl decals. Let's check it out:


Toga! Toga! Toga! is a rich purple linear holographic polish with a gorgeous cool tone. Oh man, this polish really is beautiful! And the holographic pigment is radiant, especially in the sunlight. Shown above is two coats with top coat.


Here is a closeup in the bottle and on the nail. You can really see all that rainbowy holo pigment coming through. I just had to do some nail art over this polish, because I couldn't bear to take it off, so I pulled out some KBShimmer tribal print nail vinyl decals:


To achieve this look, I stuck on the nail vinyl decals all over my nail, and painted over them with OPI A Grape Affair from HB Beauty Bar. Then, I quickly pulled off the decals to reveal this cute design! I also added a few dots here and there with a toothpick. I love how these polishes match each other so well, and I think the pinky nail came out especially nice.


Here is another shot of the tribal print nail art. Of course, gorgeous dark purple creams are difficult to photograph, so this polish almost looks black, but it's actually a beautiful eggplant color.

Here's a visual of the polishes:


The Colors by Llarowe polish, as I mentioned earlier, will be available as part of the Llarowe"A Box, Indied" subscription box for August, which retails for $50 USD and contains five full sized polishes or related products. You can follow A Box, Indied on Facebook for more information.

The KBShimmer nail decal vinyls come in a sheet of assorted designs and retail for $5 USD each, available here.

What do you think of this polish?

These products were provided for my honest review.

HB Beauty Bar China Glaze Off Shore Collection, Part 2: Stoked to be Soaked

$
0
0
I finally have the second half of the Summer 2014 China Glaze Off Shore collection! Most of you will remember my review of the first half of the collection from a bit ago - well, I'm back with six more gorgeous summer polishes, this time bright, warm tones.


As I mentioned, I love that this collection is split up into warm and cool tones, and I love that the collection covers every part of the rainbow! Let's look at them individually:


Shore Enuff is a gorgeous lime green cream with a flawless finish. This is the perfect summery green, and I love how creamy and opaque it is! Shown above is three coats with top coat.


Be More Pacific is a green-leaning creamy yellow polish, another gorgeous summer color! I would definitely describe this as a green (especially compared to the next polish), but I know some people describe it as a yellow - let's let the swatch do the talking! Shown above is three easy coats and top coat.


Sun Upon My Skin is a gorgeous lemon yellow cream! I think what I love about this collection is that it looks like it's layered over white because it's so bright, but with the opacity of these polishes, a white base is completely unnecessary. Shown above is three coats and top coat.


If In Doubt, Surf It Out is a lovely dusty orange cream. This one seems to be a bit darker on the nail than it appears in the bottle, but it looks beautiful just the same. Shown above is three thin coats and top coat.


Stoked to be Soaked is a super bright orange cream that reminds me of a traffic cone! I'm not a huge fan of bright oranges like this one, but the formula was great and I think it'll be perfect for nail art.


And finally, we have Seas the Day, a bright cherry red cream that's definitely suitable for summer. Another great color for nail art! I really enjoy this one and I love the classic summery color. Shown above is three thin coats and top coat - two coats was opaque enough, but I added a third for consistency.

As with the last half of the collection, I love all of these and I think they are all amazing for nail art - especially since the colors cover such a wide spectrum! My favorites are Shore Enuff and If In Doubt, Surf It Out.

You can get these six polishes in a set from HB Beauty Bar for $23.70 USD hereor individually here for $3.95 USD per bottle. And don't forget, you can use the code POLISHCHALLENGE at checkout for 15% off your entire order!


For those of you who follow me on Instagram, I am hosting a giveaway sponsored by HB Beauty Bar - you could win all 12 polishes from the Off Shore collection! Read the rules and how to enter here.


These products were provided for my honest review.

China Glaze Blue Gradient Nail Art

$
0
0
It seems like when I am looking for colors to use in nail art, I generally reach for China Glaze over any other brand. Well, today is no exception - I decided that a few shades of blue looked gorgeous together in my collection, and I wanted to combine them in a simple gradient nail art look!


I started with a base of China Glaze At Vase Value, and then sponged on China Glaze Too Yacht To Handle, Wait N Sea, and I Sea The Point, as well as KBShimmer Eclipse at the very edge. Then I topped it all off with top coat to smooth out the design! (Even though I used more colors, I still used the technique from my recent gradient tutorial.)


The colors didn't blend as seamlessly as I had hoped, but I think the effect looks great from slightly farther away! I think the middle shade did get lost in the muddle, though. Maybe next time I will leave off the black - I think that darkened the whole look of the manicure.


Here is a visual on the colors I used. Don't they look so pretty next to each other?

I got most of these polishes from HB Beauty Bar (no surprise there!) Use the code POLISHCHALLENGE at checkout for 15% off your entire purchase!

What do you think of this manicure?

Confetti Dotticure Nail Art (and Tutorial!) with Essie

$
0
0
Hiya guys! I've got another tutorial for you today, this time for my confetti-like dotticure nail art that I did for my birthday a couple of weeks ago!


This time I decided to go with a rather funky color scheme using all Essie polishes, but the design is still using the same technique :)

Check out the video here! (or, watch it on YouTube):


What tutorial would you like to see next?!

Sweet Addictions Subscription Box: August Swatches and Nail Art

$
0
0
Hi all, I've got the August Sweet Addictions subscription box to show you today - you'll remember my review of the July box last month - which features two lovely, limited edition polishes and some nail vinyls!


As I mentioned last month, the Sweet Addictions subscription box is curated by the creator of Cupcake Polish, and each month she will be releasing a box that contains two polishes and a limited edition product, and each one will have it's own theme! August's theme is "Circus". Let's take a look at the polishes first:


Topsy Turvy is the contribution from Cupcake Polish, a beautiful turquoise holo filled with a faint gold shimmer. While not exactly circus-y, I find that this polish is just gorgeous! The holographic pigment is especially lovely in the sunlight. Shown above is two coats with top coat.


The other polish in this box is contributed by Philly Loves Lacquer, and it's called Trilby. It's a dark blurple jelly packed to the brim with various glitters, including most prominently large lavender hexes, copper metallic squares, and pink diamonds, as well as a few sparse black stars, and a ton of blue hexes. I love the color combination here! No fishing was required for the application of this polish - quite the contrary actually, as this polish was very glitter packed. I did find that the square glitters experienced curling, so you might want to add a second coat of top coat, or avoid them entirely. Shown above is two coats, with two coats of top coat to smooth out the polish.
*EDIT: I would like to mention that upon removal of this polish, I had some minor staining. The red pigment in this polish stuck onto my nails and left them very pink. It was easily fixed with a good scrub, though!

This box also contains a few sets of nail vinyls from indie brand Love, Angeline - three sheets of diamond star vinyls, and a small sheet of elephant decals. They can be worn on the nail, with top coat, as a sticker, but I chose to use them as stencils for my nail art look:


I started with a base coat of Cult Laguna on all nails except for my ring finger, which was painted with Cult El Porto. Then, I placed the nail vinyls on my nails and painted on El Porto for the diamond stars, and attempted to sponge on a gradient over the elephant decal with Laguna and Cult Los Feliz. I was pleased to find that the vinyls worked with both painting over them, and sponging polish over them, and the edges stayed nice and crisp! I topped this manicure with matte top coat.


Here is a visual of the polishes I used for my nail art look. You can purchase Cult Cosmetics polishes on their website, and use the code "KELLI" at checkout for 15% off your entire order.

Overall, I think the August subscription box is pretty nice - the polishes look great, and the nail vinyls work very well. You can purchase the Sweet Addictions box from the Cupcake Polish shop for $30 USD starting tomorrow, July 27th.

These products will only be available in the subscription box, and there is a limited number of boxes for sale.

Are you thinking of purchasing this one? Which product/polish is your favorite?


These products were provided for my honest review.

KBShimmer 6th Anniversary Celebration Trio Swatches and Review

$
0
0
Hey all, today I've got swatches of the KBShimmer Anniversary Trio, in celebration of their sixth year of business. This collection consists of three bright, beach-themed polishes - two creams, and one shimmery textured polish.


I really love how this trio matches itself perfectly - the two creams come together as glitters in the textured polish, and the colors look just gorgeous next to each other. Along with this trio, KBShimmer has released a few new beachy nail vinyl decals. Anyway, let's look at the polishes individually:


Beach Please is an eye searing neon pink cream, with a surprisingly incredible formula. I say surprising because polishes that are this bright, always have a chalky formula, or dry to a matte finish (or both!) and yet somehow, this formula is flawless and dries to a shiny finish without top coat. Of course, I added top coat for my photo though! This is a great summer color, so you'll want to pick it up before the weather gets warm again. Shown above is three thin coats (although two is enough for those of you with shorter nails - I just found a bit of visible nail line before I added the third coat), over KBShimmer Basic Training base coat, with a coat of KBShimmer Clearly on Top quick dry top coat.


Shore Thing is a beautiful, bright turquoise cream that leans slightly green. This color is stunning, and it applied easily - however, the formula in itself isn't what I've become accustomed to with KBShimmer. The polish seems a tad bit chalky, and there are sparse clumps of dark blue unmixed pigment in my batch. I accidentally got one on my brush during my second coat, and my nails looked streaky before I added my third coat. Hopefully it's just this one batch though! Shown above is three thin coats over KBShimmer Basic Training base coat, with a coat of KBShimmer Clearly on Top quick dry top coat.


Hexy Bikini is an eye-catching silver based textured polish that dries to a textured finish. This one is a stunner! It features a ton of holographic glitters in silver, as well as in sparse hot pink and turquoise, to match the other colors in the collection. Even without sunlight, this polish sparkles unbelieveably - if you're looking for a polish that demands attention, this is your color! The formula is as expected for a textured polish, rather thick, but it's fairly easy to apply. Shown above is two thin coats, over KBShimmer Basic Training base coat, without top coat to show off the textured finish.

This collection will be available starting August 1st, and the polishes will retail individually for $7.50 USD for the creams and $8.75 for the texture - or $21 USD for the trio. I should also note that all orders on KBShimmer's website in the month of August will come with a free sample of nail vinyl decals! Don't forget to follow KBShimmer on Facebook and Instagram for news and updates.

And of course, you can find my Instagram page here, where I will also be posting all of my swatches!

What do you think of this collection? Are you planning on picking up any of them?

These polishes were provided for my honest review.

Essie Haute in the Heat Swatches and Review

$
0
0
Hi all, today I've got swatches of the Essie Haute in the Heat Collection from HB Beauty Bar! It's actually supposed to be a summer collection, but I find that all of these colors scream autumn to me.


This collection consists of six creams in a variety of colors (that are totally appropriate for autumn, haha!) Let's look at them individually:


Urban Jungle is a creamy light beige, almost white, with full coverage. This color is just gorgeous and it's got slightly pink undertones, so it matches my skin great! It'd be perfect for nail art, too (in fact, you might remember my Essie striped manicure using this color as a base.) Shown above is three thin coats with top coat.


Would you believe me if I told you this is the first brown polish I've ever owned? Fierce, No Fear is a gorgeous creamy chocolatey brown color, and yes, it is my first! This color definitely reminds me of chocolate, and I'm stunned at how awesome it looks - I never figured that I could rock brown on my nails, but I'm sold! Shown above is three coats with top coat, but it's fully opaque in two (my lightbox isn't very forgiving, so I added a third!)


Next up we have Roarrrrange, a super bright orange cream with a slightly jelly-like feel. (See, aren't these colors very fall-like so far?) Despite the slightly obnoxious name, I think this polish is gorgeous! I could definitely see some nail art with this one. Shown above is three coats and top coat.


Haute in the Heat is a red-leaning pink cream - I found the bottle for this one to be misleading, because it looked pink in the bottle but distinctly red on my nails. Even so, I think it's gorgeous and classic. Shown above is two coats with top coat.


Ruffles & Feathers is a cool toned, slightly dusty green cream. Another beauty! I absolutely love the cool undertones of this polish, and I love how bold it is. Shown above is two coats plus top coat.


Last, but definitely not least, is Strut Your Stuff, a gorgeous sky blue polish. This bright beauty is admittedly totally perfect for summer, and I love it! Shown above is three thin coats (again, this one could have been opaque in two but I added a third) and top coat.

Overall, I love these colors! I found they all had the same formula - smooth, easy to apply, and exceptionally shiny, even without top coat. My top picks are Urban Jungle and Strut Your Stuff.

These polishes are available from HB Beauty Bar for $7.50 USD per bottle, or $44.44 USD for the entire collection. Don't forget to use the code POLISHCHALLENGE at checkout for 15% off your order!


Which colors do you like best?

These products were provided for my honest review.

Inspired Freehand Vintage Floral Nail Art

$
0
0
So, let me start off by saying that I've never really delved into the "serious freehand" aspect of nail art - I usually keep it simple! But, there are so many incredible nail artists that create such beautiful art on their nails, true art, that I figured it would be worth trying. Yes, I've dabbled a bit, but today I wanted to try my hand (pun intended) at some true nail art to see if I've even got what it takes! This nail art look was pretty much totally copied from Lindsey of Wondrously Polished. She's got to be one of my favorite artists, and her nails are literally works of art. Anyway, here's my attempt at her vintage floral nails:


To achieve this look, I started with a base of OPI You're So Vain-illa (from the new Coca Cola collection, review coming soon!) Then, I mixed up some acrylic paints to create the teal, light green, and light pink colors, and painted them on with a small paint brush. I topped that all with regular top coat to smooth it out, and then matte top coat to soften the look.


I am so in love with how these turned out! Of course, they don't compare to the original manicure, but knowing that I have some sort of skill with freehand nail art is pretty much a huge relief, and now I feel like I can try other freehand patterns as well. I think this color scheme is gorgeous, too.


Since I only used one polish for this manicure, I didn't take a bottle shot like I usually do with nail art. Would you guys be interested (in the future) in seeing the acrylic paints I used as well, in my bottle shots? Again, I usually mix basic colors together, so it wouldn't be the same colors you see in the manicure. Anyway, let me know!

For those of you who aren't following Wondrously Polished yet, you can see her blog here. Not only does she do tons of gorgeous freehand nail art, but she also posts the occasional swatches of polish collections! (And we all know how obsessed I am with swatches.)

What do you think of complicated freehand nail art? Would you like to see more of it from me?

Viewing all 216 articles
Browse latest View live


Latest Images